
I started this project thinking I was making Christmas gift tags. But some of them turned out so cute I'm using them as ornaments! They are super fast and fun to make. Here's what I used:
Supplies
- Cardstock ornament shapes. I made my own using my Cricut and used two layers of cardstock.
- Alcohol Markers (other kinds might work)
- Clear embossing ink
- Stamp that is large enough to cover the ornament shapes
- Gold embossing powder
- Glossy Accents
- Gold Jump Rings

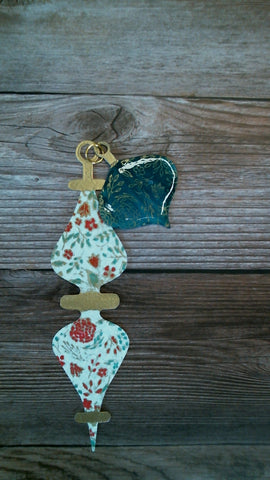
Stamped Tags

The two tags above were made in similar ways. The little one I colored then embossed. The big one I colored after embossing.
Step 1
(If you are making one like my little one) Use a marker to color the ornament.
Step 2
Ink a stamp with embossing ink and stamp, positioning it so it covers the whole bulb.
Step 3
Sprinkle ink with gold embossing powder. Blow off any extra and heat emboss.
Step 4
(If you are making one like the big one above.) Use a marker to color in the stamped image and the background.
Step 5
For a shiny finish, cover with Glossy Accents if desired. Let dry.
Step 6

Using washi tape or masking tape, cover the finished bulb, leaving the "hook" showing. Cover the hook with embossing ink. Sprinkle with gold embossing powder and heat emboss. Add a jump ring if desired.
Stencilled Tags

The two tags on either side of the picture above were stencilled.
Step 1
Use a marker to color the ornament.
Step 2

Position stencil over the colored ornament and secure.
Step 3
Cover the whole ornament with clear embossing ink.
Step 4

Cover the whole ornament with gold embossing powder. Then carefully remove the stencil. Shake off any extra powder and heat emboss.

Step 5
Using washi tape or masking tape, cover the finished bulb, leaving the "hook" showing. Cover the hook with embossing ink. Sprinkle with gold embossing powder and heat emboss. Add a jump ring if desired.
Let me know if you have any questions. Here's a video if you are interested.
As an Amazon affiliate, I may earn a small commission if you purchase from one of my links.